Difference between revisions of "Global settings"
| Line 1: | Line 1: | ||
__NOTOC__ | __NOTOC__ | ||
| − | <span class="pageTitle"> | + | <span class="pageTitle">Customize global settings</span> |
| − | [[Main Page]] > [[User manual|(UM) User manual]] > [[UM-7|UM-7 Administer ICA-AtoM]] > [[UM-7. | + | [[Main Page]] > [[User manual|(UM) User manual]] > [[UM-7|UM-7 Administer ICA-AtoM]] > [[UM-7.4|UM-7.4 Customize settings]] > UM-7.4.1 Customize global settings |
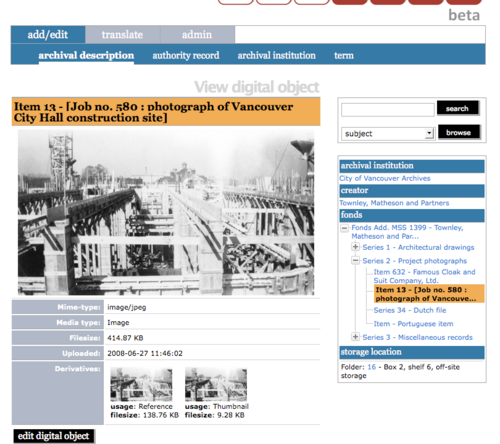
[[Image:um7-3-2Width1.png|500px|right|thumb|Digital object view screen showing reference display copy of image]] | [[Image:um7-3-2Width1.png|500px|right|thumb|Digital object view screen showing reference display copy of image]] | ||
Revision as of 15:00, 4 December 2008
Please note that ICA-AtoM is no longer actively supported by Artefactual Systems.
Visit https://www.accesstomemory.org for information about AtoM, the currently supported version.
Customize global settings
Main Page > (UM) User manual > UM-7 Administer ICA-AtoM > UM-7.4 Customize settings > UM-7.4.1 Customize global settings
One of ICA-AtoM's design assumptions is that the display dimensions of digital objects users upload typically will be too large to fit into an ICA-AtoM field. Therefore, when you upload a digital object, ICA-AtoM creates two "derivative" images: a thumbnail and a reference display copy.
- The thumbnail is for display on the archival description view screen.
- The higher-resolution reference display copy is for display on the digital object view screen.
- Typically the user clicks the thumbnail to access the digital object view screen, then clicks the reference display copy there to access the master digital object that was originally uploaded (accessible to logged-in users only).
ICA-AtoM ships with a default setting specifying the maximum width of the reference display copy at 480 pixels. This is the optimized width given ICA-AtoM's field width. Administrators, however, can increase or decrease the maximum reference image width to suit the requirements of their institution or network.
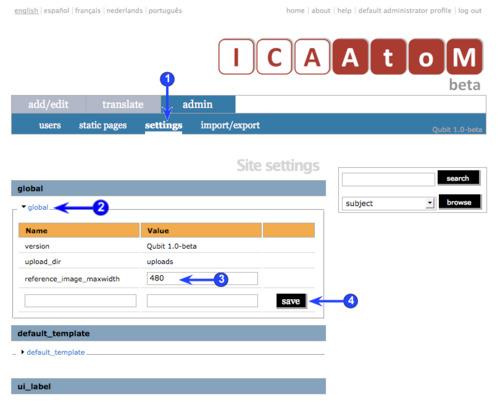
1. Click the admin > settings tab.
2. Click the global information area to display global settings.
3. Revise the reference_image_maxwidth value as required.
4. Click the save button.

