Difference between revisions of "User interface labels"
| Line 53: | Line 53: | ||
5. Click the ''save'' button to commit changes. | 5. Click the ''save'' button to commit changes. | ||
| + | |||
| + | |||
| + | [[Category:User manual]] | ||
Revision as of 22:50, 7 April 2010
Please note that ICA-AtoM is no longer actively supported by Artefactual Systems.
Visit https://www.accesstomemory.org for information about AtoM, the currently supported version.
Main Page > User manual > UM-7 Administer ICA-AtoM > UM-7.4 Customize settings > UM-7.4.4 Customize user interface labels
Users of ICA-AtoM interact with four main entities: archival descriptions, authority records, archival institutions, and terms.
- For more on entities, see UM-1.3 Entity types.
ICA-AtoM, however, is built on underlying software (Qubit) that is designed to be flexible enough to support descriptions of other types of cultural materials in addition to library holdings (such as archival, museum and art gallery materials). The code, therefore, uses generic terms for entities. Administrators can specify how they want these terms to appear in the user interface labels. The default labels that ship with ICA-AtoM represent a library-specific "theming" of the labels.
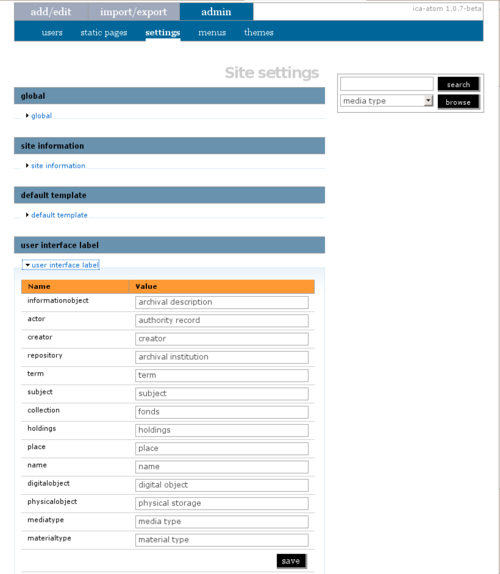
1. Click the admin > settings tab.
2. Open the user interface label information area.
3. The name column shows the generic qubit entity name and the value column shows ICA-AtoM's default user interface labels. The following is a list of the generic qubit terms and their ICA-AtoM user interface labels. Click on each label to see glossary definitions and descriptions of how the terms are used in ICA-AtoM.
- informationobject archival descriptions
- actor authority records
- creator creator
- repository archival institutions
- term terms
- subject subject
- collection fonds
- holdings holdings
- place place
- name name
- digitalobject digital object
- physicalobject physical storage
- media type media type
- material type (general material designations used in the Canadian Rules for Archival Description).
4. To change user interface labels, enter the new label(s) into the field(s) in the value column.
5. Click the save button to commit changes.
