Difference between revisions of "Create physical storage locations report & print"
| Line 8: | Line 8: | ||
== Create Physical storage report & print from View archival description screen == | == Create Physical storage report & print from View archival description screen == | ||
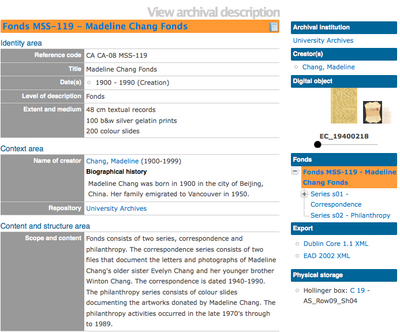
| − | [[File:StorageReportViewArchival.png| | + | [[File:StorageReportViewArchival.png|400px|right|thumb| Report icon in title bar]] |
Starting at the View archival description screen, select the level (e.g., fonds, series, file etc.) that you want to see the associated storage location. Click on the Report Icon in the title bar and ICA-AtoM will take you to a Reports screen. From the list of choices, click on the circle next to Physical storage locations and then click on the "continue" button in the button block. You can cancel your selection by clicking on the "cancel" button and ICA-AtoM will return you to the View archival description screen. | Starting at the View archival description screen, select the level (e.g., fonds, series, file etc.) that you want to see the associated storage location. Click on the Report Icon in the title bar and ICA-AtoM will take you to a Reports screen. From the list of choices, click on the circle next to Physical storage locations and then click on the "continue" button in the button block. You can cancel your selection by clicking on the "cancel" button and ICA-AtoM will return you to the View archival description screen. | ||
| Line 16: | Line 16: | ||
<div class="clearfix"> | <div class="clearfix"> | ||
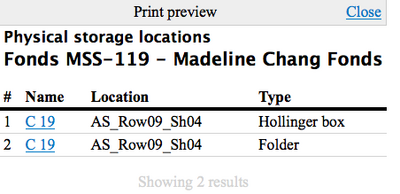
| − | [[File:FondsStorageReport.png| | + | [[File:FondsStorageReport.png|400px|right|thumb| Physical storage locations for Fonds-level]] |
ICA-AtoM takes you to a print preview page. A list of storage containers is organized under name, location and type. | ICA-AtoM takes you to a print preview page. A list of storage containers is organized under name, location and type. | ||
| Line 24: | Line 24: | ||
<div class="clearfix"> | <div class="clearfix"> | ||
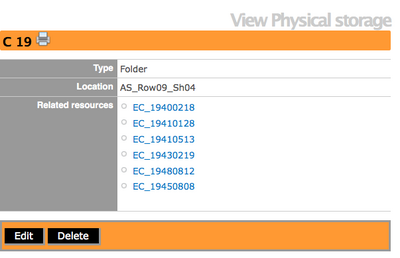
| − | [[File:ContainerLink.png| | + | [[File:ContainerLink.png|400px|right|thumb| View physical storage screen]] |
The name of each container is hyperlinked so you can click on the link and view what records are inside. | The name of each container is hyperlinked so you can click on the link and view what records are inside. | ||
Revision as of 22:02, 20 December 2011
Please note that ICA-AtoM is no longer actively supported by Artefactual Systems.
Visit https://www.accesstomemory.org for information about AtoM, the currently supported version.
Main Page > User manual > Reports/Printing > Create physical storage locations report & print
Create Physical storage report & print from View archival description screen
Starting at the View archival description screen, select the level (e.g., fonds, series, file etc.) that you want to see the associated storage location. Click on the Report Icon in the title bar and ICA-AtoM will take you to a Reports screen. From the list of choices, click on the circle next to Physical storage locations and then click on the "continue" button in the button block. You can cancel your selection by clicking on the "cancel" button and ICA-AtoM will return you to the View archival description screen.
ICA-AtoM takes you to a print preview page. A list of storage containers is organized under name, location and type.


