Difference between revisions of "Add a new archival institution"
| Line 9: | Line 9: | ||
| − | 1. On the [[main menu bar]], click the ''add / edit > archival institution'' tab; ICA-AtoM takes you to the [[list screen]] showing all existing [[ | + | 1. On the [[main menu bar]], click the ''add / edit > archival institution'' tab; ICA-AtoM takes you to the [[list screen]] showing all existing [[archival institution|archival institutions]]. |
| Line 15: | Line 15: | ||
| − | 3. | + | 3. On loading, the [[edit screen]] displays the record with all [[Information area|information areas]] closed; click on an [[information area]] to access the [[Field|fields]] grouped under it. |
| − | |||
| Line 22: | Line 21: | ||
| − | 5. Click the [[create button]] in the [[button block]] to save the new record. | + | 5. Click the [[Create button|create button]] in the [[button block]] to save the new record. |
Revision as of 15:29, 25 August 2009
Please note that ICA-AtoM is no longer actively supported by Artefactual Systems.
Visit https://www.accesstomemory.org for information about AtoM, the currently supported version.
Create a new archival institution
Main Page > User manual > UM-3 Add / edit content > UM-3.3 Add / edit archival institutions > UM-3.3.1 Create a new archival institution
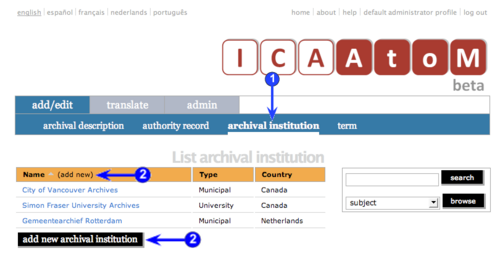
1. On the main menu bar, click the add / edit > archival institution tab; ICA-AtoM takes you to the list screen showing all existing archival institutions.
2. Click the add new text that appears in the name column header; ICA-AtoM takes you to a blank edit screen for data entry.
3. On loading, the edit screen displays the record with all information areas closed; click on an information area to access the fields grouped under it.
4. You can quit the create process at any time by clicking the cancel button in the button block; no new record will be created.
5. Click the create button in the button block to save the new record.

