Difference between revisions of "Manage user accounts"
| Line 8: | Line 8: | ||
<div class="clearfix"> | <div class="clearfix"> | ||
| + | |||
| + | [[Image:adminMenu.png|500px|right|thumb|Fig. 1 In the "Admin" menu, select "Users"]] | ||
*Every user of the system who needs to be able to add, edit, or delete [[Glossary#Database content|database content]] must have a [[Glossary#User account|user account]]. Only [[Glossary#Administrator|administrators]] can add new [[Glossary#User account|user accounts]]. | *Every user of the system who needs to be able to add, edit, or delete [[Glossary#Database content|database content]] must have a [[Glossary#User account|user account]]. Only [[Glossary#Administrator|administrators]] can add new [[Glossary#User account|user accounts]]. | ||
| − | *In the [[Glossary#Admin menu|admin menu]], select "Users" (Fig. 1). This will take you to a list of current [[Glossary#User account|user accounts]]. | + | *In the [[Glossary#Admin menu|admin menu]], select "Users" (Fig. 1). This will take you to a list of current [[Glossary#User account|user accounts]]. |
The List users page has two presentation options: "Show active only" and "Show inactive only" which allow the Administrator to view active users and inactive users in the system. | The List users page has two presentation options: "Show active only" and "Show inactive only" which allow the Administrator to view active users and inactive users in the system. | ||
| Line 17: | Line 19: | ||
<div class="clearfix"> | <div class="clearfix"> | ||
| + | |||
| + | [[Image:user.png|500px|right|thumb|Fig. 2 Enter the data in the user edit page, then click "Create"]] | ||
*Click "Add new" in the [[Glossary#Button block|button block]] at the bottom of the List users page. ICA-AtoM routes you to a blank [[Glossary#Edit page|edit page]]. | *Click "Add new" in the [[Glossary#Button block|button block]] at the bottom of the List users page. ICA-AtoM routes you to a blank [[Glossary#Edit page|edit page]]. | ||
| − | |||
<p>In the "Basic info" [[Glossary#Information area|information area]] enter the following data (Fig. 2): | <p>In the "Basic info" [[Glossary#Information area|information area]] enter the following data (Fig. 2): | ||
Revision as of 15:41, 30 August 2012
Please note that ICA-AtoM is no longer actively supported by Artefactual Systems.
Visit https://www.accesstomemory.org for information about AtoM, the currently supported version.
Main Page > User manual > Administer > Manage user accounts
This section describes how to add, edit, and delete user accounts in your ICA-AtoM application.
Add a new user
- Every user of the system who needs to be able to add, edit, or delete database content must have a user account. Only administrators can add new user accounts.
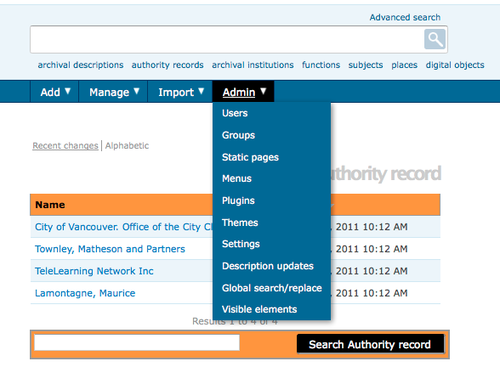
- In the admin menu, select "Users" (Fig. 1). This will take you to a list of current user accounts.
The List users page has two presentation options: "Show active only" and "Show inactive only" which allow the Administrator to view active users and inactive users in the system.
- Click "Add new" in the button block at the bottom of the List users page. ICA-AtoM routes you to a blank edit page.
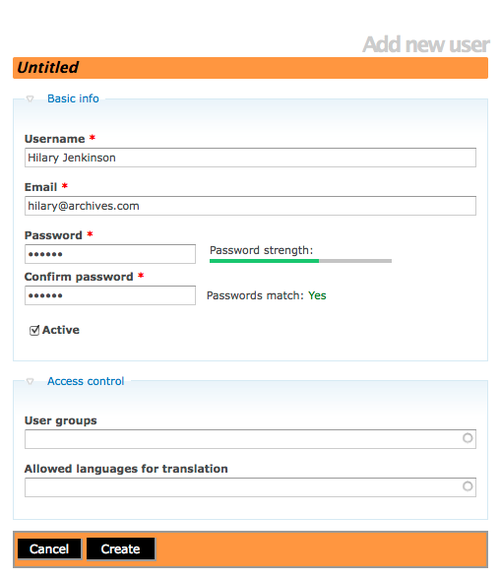
In the "Basic info" information area enter the following data (Fig. 2):
- In "Username" enter the user's name
- In "Email" enter the user's email address; the email address (rather than the user name) is used when logging in
- In "Password" enter the user's default password. Note that users can later change their own password (see change password).
- In "Confirm password" enter the password again
- The default is Active (you must deselect to make the user inactive)
For more on user roles, see user roles.
- You can add multiple user roles to an account; for example, a user may need both editor and translator access privileges.
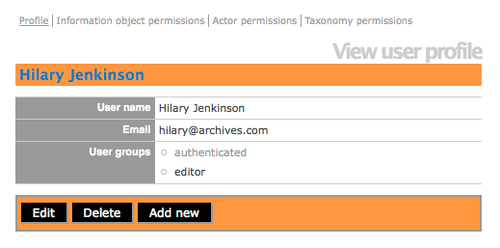
- Click "Create". ICA-AtoM creates the new account and routes you to the view page (view user profile).
- The View user profile screen presents the profile, the information object permissions, the actor permissions and the taxonomy permissions as hyperlinks/tabs.
You can refine user permissions in the groups and permissions information area, see edit permissions.
Add a new group
-
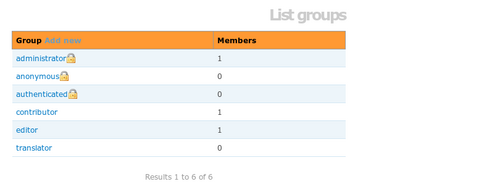
In the admin menu, select "Groups". This will take you to a list of current groups. Click "Add new" in the column header (Fig. 3).
-
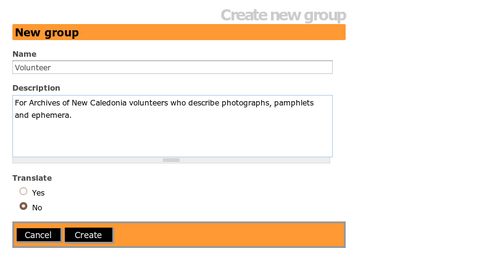
In "Name" enter the name of the group you wish to add (e.g. "Volunteer"). Add a description, then click "Create" (Fig. 4).
-
At this point you will need to add access privileges for this group. For information on how to do that, see edit permissions.
