Difference between revisions of "Manage user accounts"
| (11 intermediate revisions by the same user not shown) | |||
| Line 21: | Line 21: | ||
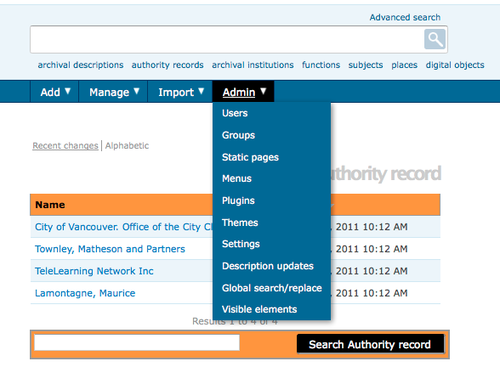
In the [[Glossary#Admin menu|admin menu]], select "Users" (Fig. 1). This will take you to a list of current [[Glossary#User account|user accounts]]. | In the [[Glossary#Admin menu|admin menu]], select "Users" (Fig. 1). This will take you to a list of current [[Glossary#User account|user accounts]]. | ||
The List users page has two presentation options: "Show active only" and "Show inactive only" which allow the Administrator to view active users and inactive users in the system. | The List users page has two presentation options: "Show active only" and "Show inactive only" which allow the Administrator to view active users and inactive users in the system. | ||
| + | |||
| + | </ol> | ||
</div> | </div> | ||
| Line 26: | Line 28: | ||
<div class="clearfix"> | <div class="clearfix"> | ||
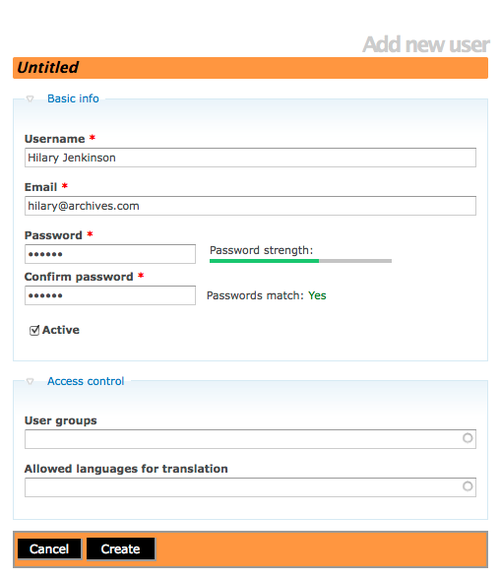
| − | [[Image:user.png|500px|right|thumb|Fig. 2 Enter the data in the user edit page, then click "Create"]] | + | <p>[[Image:user.png|500px|right|thumb|Fig. 2 Enter the data in the user edit page, then click "Create"]] |
| + | |||
| + | <ol> | ||
| + | |||
| + | <li> | ||
| + | |||
| + | Click "Add new" in the [[Glossary#Button block|button block]] at the bottom of the List users page. ICA-AtoM routes you to a blank [[Glossary#Edit page|edit page]]. | ||
| − | + | <li> | |
| − | + | In the "Basic info" [[Glossary#Information area|information area]] enter the following data (Fig. 2): | |
* In "Username" enter the user's name | * In "Username" enter the user's name | ||
* In "Email" enter the user's email address; the email address (rather than the user name) is used when logging in | * In "Email" enter the user's email address; the email address (rather than the user name) is used when logging in | ||
* In "Password" enter the user's default [[Glossary#Password|password]]. Note that users can later change their own [[Glossary#Password|password]] (see [[change password]]). | * In "Password" enter the user's default [[Glossary#Password|password]]. Note that users can later change their own [[Glossary#Password|password]] (see [[change password]]). | ||
* In "Confirm password" enter the [[Glossary#Password|password]] again | * In "Confirm password" enter the [[Glossary#Password|password]] again | ||
| − | *The default is Active (you must deselect to make the user inactive) | + | * The default is Active (you must deselect to make the user inactive) |
| + | |||
| + | <li> | ||
In the "Access control" [[Glossary#Information area|information area]] Select the appropriate user group (Fig. 2). The user group, or [[Glossary#User role|user role]] determines the user's [[Glossary#Access privilege|access privileges]]. Select the allowed languages for translation. | In the "Access control" [[Glossary#Information area|information area]] Select the appropriate user group (Fig. 2). The user group, or [[Glossary#User role|user role]] determines the user's [[Glossary#Access privilege|access privileges]]. Select the allowed languages for translation. | ||
| + | |||
| + | <li> | ||
| + | |||
| + | </ol> | ||
| + | </div> | ||
| + | |||
| + | <div class="clearfix"> | ||
</div> | </div> | ||
For more on [[Glossary#User role|user roles]], see [[user roles]]. | For more on [[Glossary#User role|user roles]], see [[user roles]]. | ||
| − | + | ||
| − | + | <ol> | |
| + | |||
| + | <li> | ||
| + | |||
| + | You can add multiple [[Glossary#User role|user roles]] to an account; for example, a user may need both [[Glossary#Editor|editor]] and [[Glossary#Translator|translator]] [[Glossary#Access privilege|access privileges]]. | ||
| + | |||
| + | <li> | ||
| + | |||
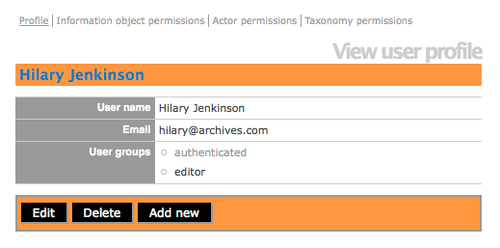
| + | Click "Create". ICA-AtoM creates the new account and routes you to the [[Glossary#View page|view page]] (view user profile). | ||
| + | |||
| + | <li> | ||
| + | |||
| + | The View user profile screen presents the profile, the information object permissions, the actor permissions and the taxonomy permissions as hyperlinks/tabs. | ||
| + | |||
| + | <li> | ||
| + | |||
| + | You can refine user permissions in the groups and permissions [[Glossary#Information area|information area]], see [[edit permissions]]. | ||
| + | |||
| + | </ol> | ||
<div class="clearfix"> | <div class="clearfix"> | ||
| − | + | <p>[[Image:Userprofile.png|500px|right|thumb|View user profile]] | |
| − | [[ | ||
| − | |||
| − | |||
</div> | </div> | ||
Latest revision as of 15:54, 30 August 2012
Please note that ICA-AtoM is no longer actively supported by Artefactual Systems.
Visit https://www.accesstomemory.org for information about AtoM, the currently supported version.
Main Page > User manual > Administer > Manage user accounts
This section describes how to add, edit, and delete user accounts in your ICA-AtoM application.
Add a new user
- Every user of the system who needs to be able to add, edit, or delete database content must have a user account. Only administrators can add new user accounts.
- In the admin menu, select "Users" (Fig. 1). This will take you to a list of current user accounts. The List users page has two presentation options: "Show active only" and "Show inactive only" which allow the Administrator to view active users and inactive users in the system.
- Click "Add new" in the button block at the bottom of the List users page. ICA-AtoM routes you to a blank edit page.
-
In the "Basic info" information area enter the following data (Fig. 2):
- In "Username" enter the user's name
- In "Email" enter the user's email address; the email address (rather than the user name) is used when logging in
- In "Password" enter the user's default password. Note that users can later change their own password (see change password).
- In "Confirm password" enter the password again
- The default is Active (you must deselect to make the user inactive)
- In the "Access control" information area Select the appropriate user group (Fig. 2). The user group, or user role determines the user's access privileges. Select the allowed languages for translation.
For more on user roles, see user roles.
- You can add multiple user roles to an account; for example, a user may need both editor and translator access privileges.
- Click "Create". ICA-AtoM creates the new account and routes you to the view page (view user profile).
- The View user profile screen presents the profile, the information object permissions, the actor permissions and the taxonomy permissions as hyperlinks/tabs.
- You can refine user permissions in the groups and permissions information area, see edit permissions.
Add a new group
-
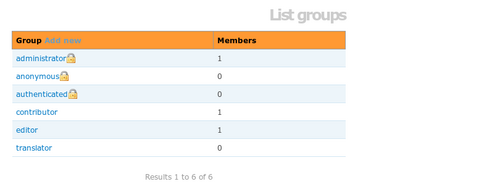
In the admin menu, select "Groups". This will take you to a list of current groups. Click "Add new" in the column header (Fig. 3).
-
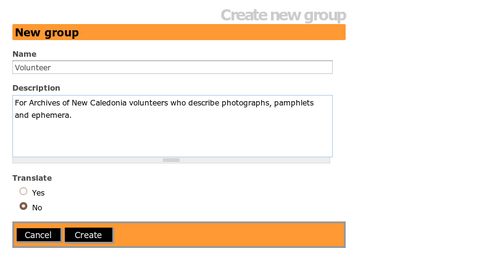
In "Name" enter the name of the group you wish to add (e.g. "Volunteer"). Add a description, then click "Create" (Fig. 4).
-
At this point you will need to add access privileges for this group. For information on how to do that, see edit permissions.
